Blog

  • Today is Anti-procrastination Day! A Christmas Fudge Recipe for Spring

    Today is Anti-procrastination Day! A Christmas Fudge Recipe for Spring

    amazing fudge cropped

    Well, today is the day! Back to blogging!

    I have been putting off posting for a very long time…do you want to know how bad it is? I uploaded a Christmas Fudge Recipe and video to You Tube with the intention of posting it here before Christmas! Then it would have been a great post for Valentines day. But now it is March and it is not a great post for anything except that it’s an easy recipe that tastes good.

    So here is the recipe and the video.

    Amazing Christmas Fudge

    • 1/2 cup natural peanut butter
    • 1 1/2 cups carob chips (you can use Chocolate if you like)
    1. Spread peanut butter all over the inside of a medium glass bowl so that you have a “peanut butter bowl.”
    2. Add carob chips to bowl, making sure that no carob chips touch the sides of the bowl.
    3. Microwave on high 1 to 1 1/2 minutes.
    4. Remove from microwave and stir vigorously with a spoon until smooth. Chips will look glossy, not melted, until they are thoroughly stirred—be patient! If they don’t completely melt, you may put them back in the microwave, but only for 10 seconds at a time. Carob chips burn very easily.
    5. Pour into a plastic wrap-lined pan and chill.
    6. Remove from pan and cut into squares.

    If you don’t want to use a microwave, you can use a double boiler to melt your carob chips, but be careful since carob burns easily.

    VARIATIONS –

    • Add 1 cup chopped walnuts or pecans
    • Add 1/2 cup toasted coconut and ½ cup toasted almonds
    • Add 1 cup raisins and ½ cup chopped nuts
    • Add 1 teaspoon peppermint flavoring

    Also on the Video….

    Peanut Buttery Cookies

    • 2 cups quick oats
    • 1 1/3 cups whole-wheat pastry flour
    • 2 teaspoons aluminum free baking powder
    • 2/3 cup brown sugar
    • 1/2 cup natural peanut butter
    • 1/2 cup non-dairy milk
    • 1/3 cup oil
    • 1/4 cup unrefined sugar
    • 4 teaspoons ground flax seeds1 1/2 teaspoons vanilla

    Extra’s

    • 1/3 to 1/2 cup peanut butter
    1. Pre-heat oven to 350 degrees. Line large baking sheet with parchment paper.
    2. Mix dry ingredients together in a medium bowl.
    3. Mix wet ingredients together in another bowl.
    4. Mix dry ingredients into wet ingredients until just combined. As you stir drop teaspoons full of the extra peanut butter but don’t mix it all in.  That way you end up with pockets of real peanut butter in every bite!
    5. Use a 2-tablespoon scoop to make balls and place them on the lined cookie sheet, pressing down slightly.
    6. Bale for 11 to 12 minutes. Until cookies are slightly browned on the edges.
    7. Makes 36 cookies.
    8. or pat 1 1/2 cups of the dough into 8×8 pan.
    9. Pour warm Amazing Fudge over the dough. Sprinkle 3/4 cups of the dough over the top and bake for 20-25 minutes.
  • Chunky, Crunchy Homeade Granola

    Chunky, Crunchy Homeade Granola


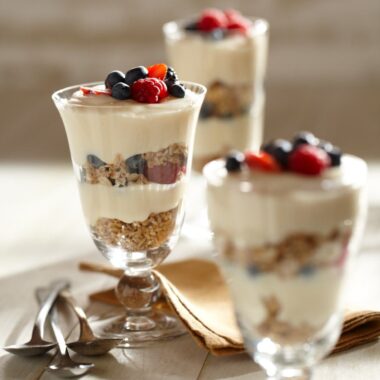
    I love waking up to the smell of granola in the oven.  We made this recipe on the 3ABN Today program so I thought I would share the recipe with you. It is delicious in a bowl with fresh fruit or in a granola  parfaits with the Vanilla Pudding I posted a while ago.

    Granola

    Dry Ingredients

    • 12 cups rolled or quick-cooking oats
    • 1 cup whole grain flour
    • 1 1/2 cups unsweetened coconut
    • 1 1/2 cups chopped nuts (walnuts, pecans, almonds or a combination)

    Wet Ingredients

    • 1 1/2 cups  water
    • 1 to 1 ¼ cups brown sugar
    • 1/2 cup oil
    • 2 tablespoons vanilla extract
    • 1 1/2 teaspoons salt
    1. Preheat oven to 200°F.
    2. Mix dry ingredients together in a large bowl.
    3. Mix wet ingredients together in a separate small bowl.
    4. Add wet mixture to dry mixture. Mix gently with a spoon or your hands until all of the ingredients are moistened.
    5. Spread onto two large baking sheets.
    6. Bake overnight (6 to 8 hours) or bake at 300°F for 2 hours, stirring every 15 minutes.
    7. Cool completely before storing in an airtight container.

    Makes 40 servings.


  • Take the Edge off the Cold with Vegan Corn Chowder

    Take the Edge off the Cold with Vegan Corn Chowder

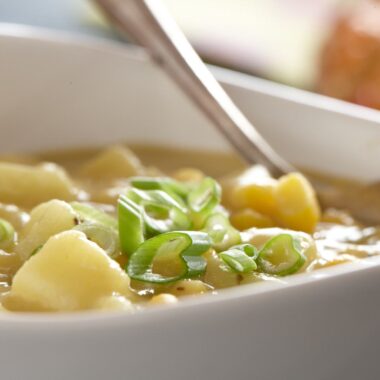
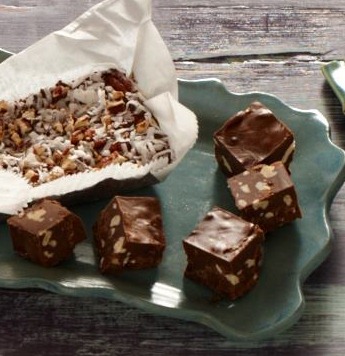
    It’s getting cold..Ridzogirl is already praying for snow….I am praying that the snow can hold off until January! But the fall weather is here and it is time to make the best of it. The best of it for me is soup.

    Soup always warms me up, I don’t really appreciate the brothy kind of soups I like it to be thick and chunky. There are five really good soups in our cookbook Give Them Something Better, and one of our family favorites is the Corn Chowder. It is creamy and full yummy potatoes and really hits the spot on a cooler fall day.

    I do hope we can hold off on that snow thing for a while. I wonder how God handles these conflicting prayers?

    Vegan Corn Chowder

    • 7  cups potatoes, peeled and diced
    • 1 medium onion, chopped
    • 1/2 cup raw cashews
    • 3 cans (15 ounces) corn, divided
    • 1/4 cup Chicken Style Seasoning (I like la Chikky by Vegetarian Express)
    • 1/4 cup nutritional yeast flakes
    • 1 teaspoon  dried basil
    • 1 teaspoon onion powder

    1. Place potatoes and onions in a large pot and cover with water; bring to a boil over high heat. Reduce to a low boil; cook until potatoes are tender.

    2. Place 2 cups of the potato and onion mixture in a blender; add cashews and half of one can of corn. Blend until smooth, adding additional water as necessary.

    3. Pour contents of blender, along with the remaining ingredients, into pan with cooked potatoes and simmer until heated through. Add water as needed to reach desired consistency.

    Makes 12 servings.

    Do not boil; the soup will curdle.

    Corn Chowder 640 with text


  • Homeade Vegan Ravioli

    Homeade Vegan Ravioli

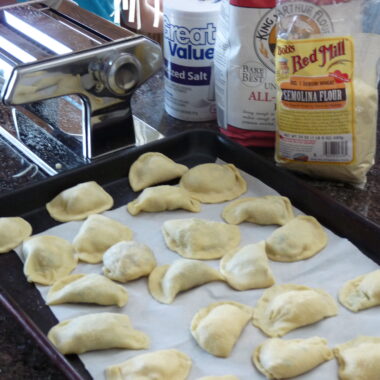
    I finally did it! last year for Christmas my mother gave me a pasta maker for Christmas. I must have been some what intimidated by it because it took me 8 months to get the thing out and actually make pasta! And  really it wasn’t as hard as I thought.  I watched a few videos and enlisted the help of my 9 year old daughter.

    Okay, we watched a lot of videos.  One important thing we learned was the folding the pasta and putting it back through the machine several times…we always folded ours in thirds.

    When filling the ravioli we learned a few things. First, don’t make your ravioli sheets too long, they are difficult to handle. Second don’t wait to long after you roll the dough out to fill it. The dough gets dry and is hard to stuff.

    We watched a cool video of someone who had a ravioli attachment for their pasta machine, but I couldn’t find it again to share it with you. Sorry.  We made half-circle ravioli by using a large round cookie cutter, filling half of the dough and folding it over, using a little water on the edge like she did in the video, then we cooked ’em.

    Way easier than I ever thought possible, and so good.  We immediately started thing of how many ways we can use this thing to make more raviolis and if we got that ravioli attachment we would be unstoppable.  However, reality has now set in and I now realize that making ravioli is not going to be a daily or even weekly event in our house but we will be making them again soon!

    I used the vegan pasta recipe from the Vegan Dad and my homemade Tofu Ricotta and added a few sauteed mushrooms.

    Tofu Ricotta

    • 2 packages (14 ounces) water-packed tofu, firm or extra-firm
    • 1 package (16 ounces) frozen spinach, thawed and drained (optional)
    • 1 cup soy sour cream or soy mayonnaise
    • 1/4 cup lemon juice
    • 1/4 cup cane juice crystals or other sweetener
    • 1 1/4 teaspoons salt
    • 3/4 teaspoon onion powder
    • 3/4 teaspoon garlic powder
    1. Drain excess water from tofu.
    2. Mash tofu in a large bowl with a potato masher or your hands.
    3. Add remaining ingredients to tofu; mix well. Add additional salt or sweetener if needed.


  • Why are American Kids Such Picky Eaters?

    Why are American Kids Such Picky Eaters?

    I Love Love Love this book! French Kids Eat Everything by Karen le Billion for months. I read it during my long trip to California over the summer. It is such a fun and engaging book that explores the real reasons most American kids are so picky at the table and amazingly how French kids eat everything …almost literately.

    Karen le Billion is an American girl who married a Frenchman, and while on a year long stay in France she learned  how to help her girls be more adventurous eaters. I’ll be honest I was shocked about how seriously the French take their food and how intentionally they pass that on to their children without whining or fighting or even counting bites ; )

    If know a picky eater, or maybe you are one, you will be blessed by this fun easy to read book.  I promise you will come away with a whole new view of teaching kids to eat and some real practical ways about how to make it happen. The best part is we get to learn from Karen’s mistakes!

    Actually the best part is the book is on sale now for just $3.99 as an ibook, nook book or kindle.  click here for links to buy the book. Here is a sneak peak at the French Food Rules from the back of her book.


  • Smooth and Creamy Vegan Vanilla Pudding Video and Recipe

    Smooth and Creamy Vegan Vanilla Pudding Video and Recipe

    vanilla pudding


    This week I am doing cooking demonstrations in the middle of the redwood forest.  Yes, under the trees. It seems strange and amazing at the same time. The trees out here are huge! As soon as I am done cooking I plan to take the kids and do a lot of exploring!

    Today I am making granola parfaits with creamy vanilla pudding, so I thought I would “share the wealth” as it were and let you watch Sarah and I demonstrate it on 3ABN.  I realize it is not at all the same as sitting in a grove of beautiful redwood trees…but it is the best I can do! Hope you enjoy!

    Click HERE for the recipe.